Divi’s default blog archive page isn’t necessarily outdated, but it’s a bit boring for people like us who use Divi all the time.
The Project
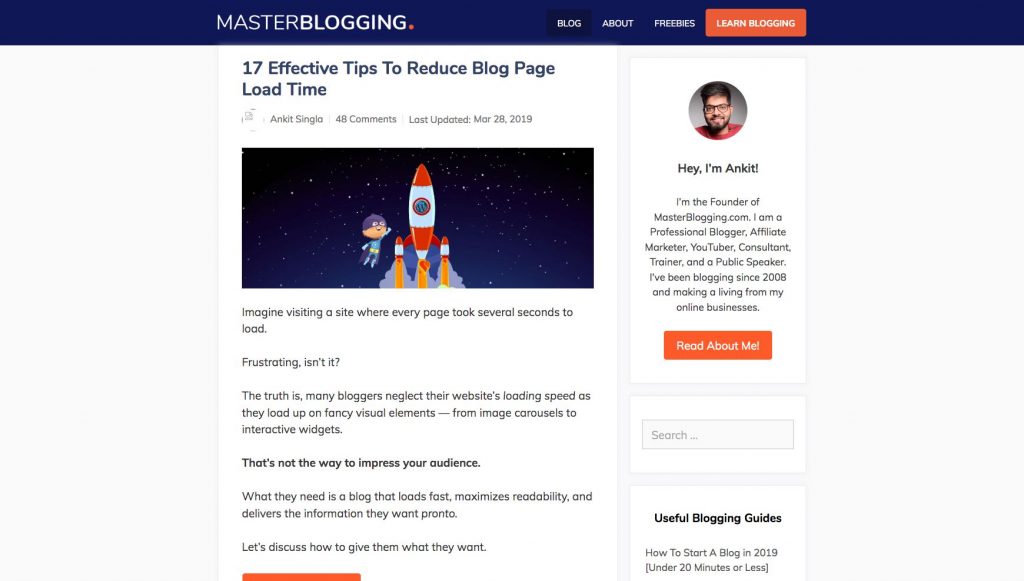
I got a request from a guy who reached out wanting some help with styling his blog, and he wanted it to look like these guys:
The Problem
Although it looks kinda simple to do, the main problem is getting this done without actually editing any php files. I think once it goes into major file edits, I lose a lot of people following along haha and it’s a lot easier this way.
So the main problem that I had to solve was the orphaned text that is the excerpt. (I talk about this in the video) Because it’s hard to manipulate that text without a tag around it, it’s tricky to put the title / meta above the featured image.
I ended up re-ordering via flexbox.
Hey, I have a course that specifically covers flexbox and media queries!
Come check it out if you want to learn more about how to make Divi more responsive.

So yeah, flexbox to the rescue.
However, there are a few more problems to solve. Mainly the fact that the default Divi archive uses float which can be a problem in getting the layout just right. (or at least to the my basic standards) So .. yeah, for this, I had to use flexbox again to ensure the ratios and gutter widths.
The result
Here’s what we get.
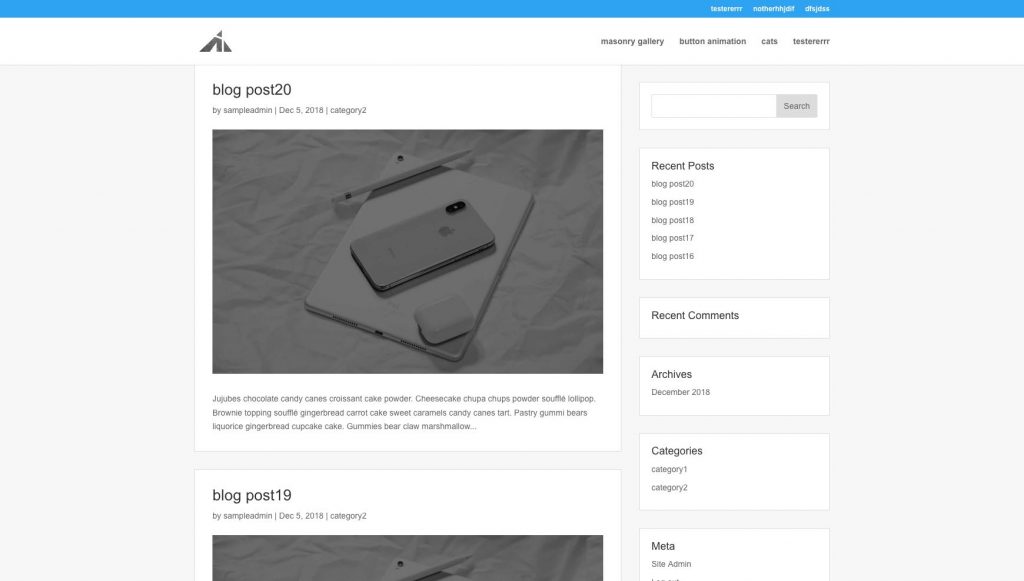
Not too bad.
Let’s watch the video, and I’ll explain some stuff.
The video
The snippet
#content-area {
  display: -webkit-flex;
  display: flex; }
  #content-area #left-area {
    float: none;
    width: 70%;
    box-sizing: border-box;
    margin-top: -1px;
    padding-right: 30px; }
    #content-area #left-area .et_pb_post.format-standard {
      border: 1px solid #ddd;
      box-sizing: border-box;
      margin-bottom: 30px;
      padding: 30px;
      background: white;
      display: -webkit-flex;
      display: flex;
      flex-wrap: wrap;
      flex-direction: column-reverse; }
      #content-area #left-area .et_pb_post.format-standard .entry-featured-image-url {
        width: 100%;
        order: 1; }
      #content-area #left-area .et_pb_post.format-standard .entry-title {
        width: 100%;
        order: 3; }
      #content-area #left-area .et_pb_post.format-standard .post-meta {
        width: 100%;
        order: 2; }
  #content-area #sidebar {
    float: none;
    width: 30%;
    box-sizing: border-box;
    padding-left: 0;
    padding-bottom: 0;
    padding-top: 30px; }
    #content-area #sidebar .et_pb_widget {
      border: 1px solid #ddd;
      box-sizing: border-box;
      padding: 20px;
      background: white; }

.single.single-post #content-area #left-area .et_pb_post.format-standard {
  flex-direction: column; }

#main-content {
  background: #f7f7f7; }
  #main-content .container {
    padding-top: 0px; }
    #main-content .container:before {
      display: none; }
Copy all of that and drop it into either
– child theme css file (most recommended, get your free child theme here)
– Theme options > custom CSS
– Customizer > custom CSS
Alternative
If you want to learn how to style everything yourself, but make the category pages (archive) work, check out this post:
[sc name=”learn css”]

Henry Obilor says:
I’ve been looking forward to this tutorial. Thanks for this PK
PK says:
You’re welcome, thanks buddy!