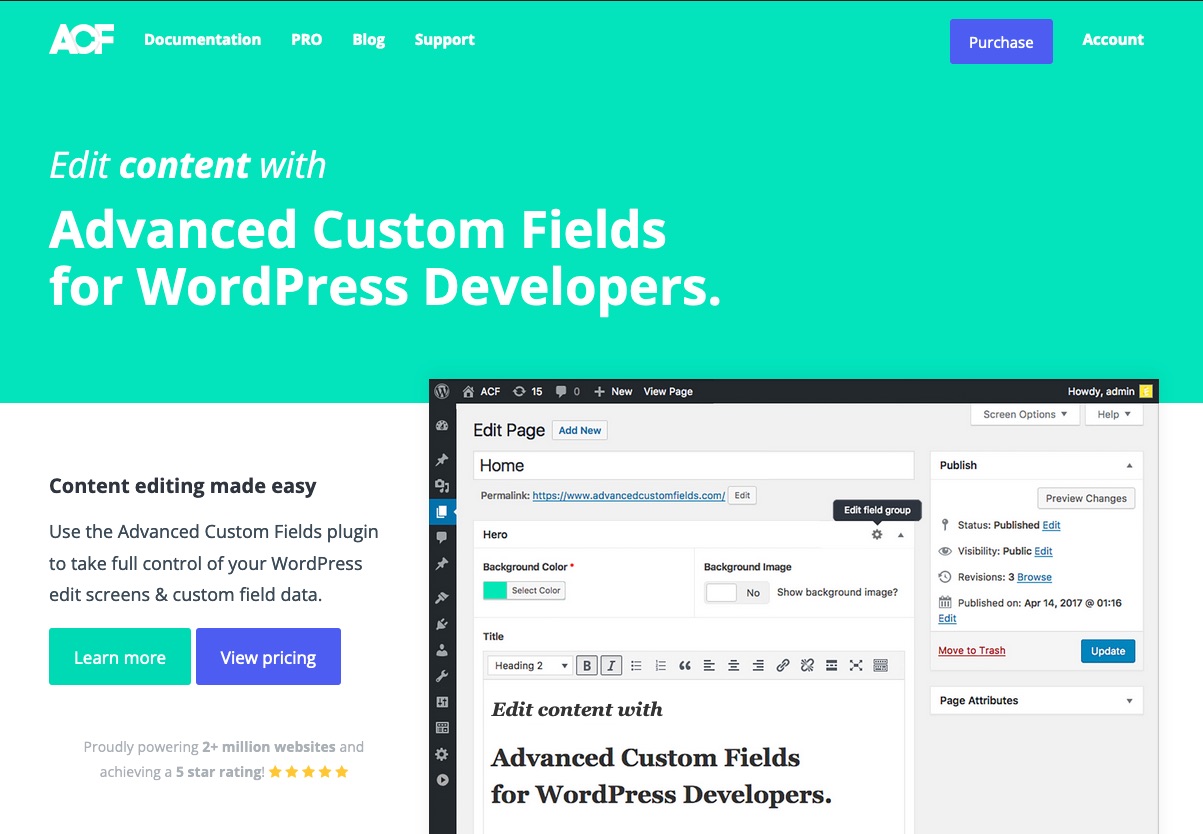
Advanced Custom Fields is very cool.
Yes, there are similar products out there, such as metabox, pods, and toolset, which are all pretty good and has their pros and cons, but ACF has the best and widest integration out there, and that’s what I use most of the time, so we’re talking about ACF.
With ACF (and CPTs) you can pretty much build your own CMS the way you want it to.
To really make your own custom system, you’ll need to invest in ACF Pro, and if you want a whole course on making your own theme check this out.
OK, so let’s talk about ACF in this tutorial.
The Parameters
Since the point of these tutorials is to help people make better websites, and since it’s a free tutorial, here are the parameters I’m going to stick to:
- ACF free – The WP repository has a free version of ACF. It’s really good. I’ll talk about the differences from pro in a sec.
- Premium page builder – Most people have a page builder that they love. And that means more likely than not, they’ve paid for a premium version of it (and some addons) for their work.
- No PHP. Using ACF while writing your own templates and blocks in php is really great, but php is a whole other thing you’ll have to learn, and you’re not here for that. So no code.
So that’s it. I know many of y’all have built a site or two, and a fair few of y’all have built for clients, and that means there are a lot of things that can happen. and clients breaking websites is definitely one of them.
That is why this tutorial is going to show how to build pages/templates that will not break.
With your page builder of choice.
With the free version of ACF.
Without code.
Nice, right?
Cool. So one more parameter to set before we dive into ACF.
Which page builder?????
In terms of popular page builders, I’m going to go with the top 4 page builders that most WP agencies prefer to use. (and that means no Themeforest themes)
and they are: (in alphabetic order because none of y’all can behave)
Beaver Builder, Divi, Elementor, and Oxygen Builder.
Nothing against Fusion, UX, Cornerstone, or VC, and I’ve used all of them at some point in my 15 years of WP, but I’m going to exclude them since:
- They have their own ecosystem, and it feels like there’s a lot of fragmentation, and more often than not, they’re not hanging out with the rest of the WP community, both the people and integrations.
- Avada (Fusion) has the largest customer base, and they’re at 800k (which is still a HUGE number), which puts Fusion only above Oxy, but I like Oxy about 11,983 times more than Avada, so … no. And the rest have a much larger user base than Avada.
- It also seems that Themeforest themes are more about finished solutions via demo content than providing agencies and designers with top to bottom development solutions that are intended to be built from scratch. This tutorial is mostly for providing better solutions for the client, so it’s better to focus on the builders that agencies prefer.
So yeah, getting back to the big 4 page builders, they all have ACF integration in their paid versions. (for the record, Divi and Oxy don’t have free versions) And they all support ACF free. yay
ACF Free vs. Pro
Now for the differences between ACF free and pro.
I know there are a bit more differences here and there, but the 3 key differences are:
- Gutenberg blocks: You can make custom Gutenberg blocks with ACF. It’s really really cool.
- Repeater/Flexible fields: This allows you to essentially put together a custom page builder yourself.
- Theme options page: You can make a cool backend options page that can be used for global elements.
However, if you follow along with this tutorial, you’ll see that we can sort of mitigate a lot of the shortcomings of the free version.
Point 1. Custom Gutenberg Blocks
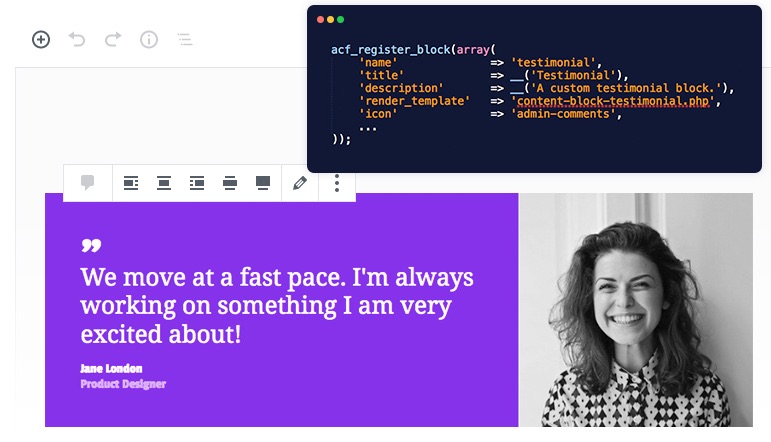
Being able to make custom Gutenberg blocks means you can sort of make your own page builder system. Also, it means you can make complex templates usable in the blog without using a page builder (which is always good to use raw WP default for the blogs and just template around it).
Although we can’t make our own custom blocks, there are two things you can do to minimize this need.
a. Use Gutenberg pattern blocks. They’re more useful than people give credit for. Have a look here:
https://wpdeveloper.com/wordpress-block-patterns-reuse-gutenberg/
https://www.webprotime.com/gutenberg-block-patterns/
b. Since complex layouts are usually for pages, and not blog posts, the lack of custom blocks doesn’t affect the overall build as much. However, if you really want more pro-built modules for Gutenberg, then there are a few really good addons you can try.

UAG (apparently now called Spectra) https://wordpress.org/plugins/ultimate-addons-for-gutenberg/
GutenBee https://wordpress.org/plugins/gutenbee/
GetWid https://wordpress.org/plugins/getwid/
Otter https://wordpress.org/plugins/otter-blocks/
Cool? Cool.
Point 2. Repeater Fields and Flexible Fields

If you are developing the website as per the approved proof (which you should) and the proof is designed in a way that’s practical and efficiently develop-able (learn how to design better proofs here) then more often than not, you don’t need to have to use repeater or flexible fields.
What those fields do is they allow the backend user to add more blocks within an ACF based interface, so the user can stay within the pre-built layouts. It’s very useful when making custom themes and layouts.
However, there’s a LOT of code that is involved, both in structure and styling. Also that approach is not needed when developing from an approved design proof. We have regular page builders for that. So no need for repeater or flexible fields.
Point 3. Theme options page.
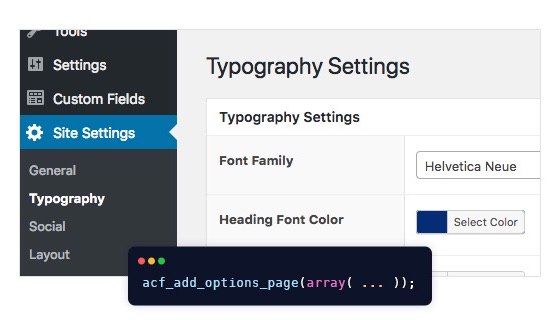
This I have a “hack” for if you’re willing to code some bits and pieces yourself. Otherwise, this is going to have to be compensated for by using global templates. Beaver builder calls it , Divi calls it “Theme Builder,” Elementor also calls it “Theme Builder,” and Oxygen calls it… nothing, it’s just part of “templates.”
I’ll go over the hack right here. It’s really simple. (I also cover this in the presentation video)
Steps:
- Make a page and title it ‘theme settings’ or something, and get its ID. (Check the page url when editing the page)
- Assign an ACF field group to just that page.
- Add what you need to that field group.
- When referring to that field, just use the page ID where ‘option’ should go. (example code below)
<?php the_field('logo_light', 12 ); ?>
and although a little clunky, it totally works.
The Video
Now let’s get down to business here’s a video of me explaining this stuff at a WordPress group in Halifax Canada.
That is a horrible screenshot hahahaha
Timestamps:
- 0:00 intro
- 2:15 ACF intro
- 5:15 How far you can take ACF with custom themes
- 8:45 Benefits of using ACF with your page builder
- 10:40 Setting up the fields
- 16:15 Beaver Builder
- 23:15 Divi
- 26:35 Elementor
- 30:05 Oxygen Builder
- 33:55 Differences between ACF pro and free
- 41:00 Conclusion
For people who need to keep this window open and follow along step by step (the way I prefer it) with screenshots, etc, then follow the first common step, and then scroll through to your builder of choice below.
The Objective
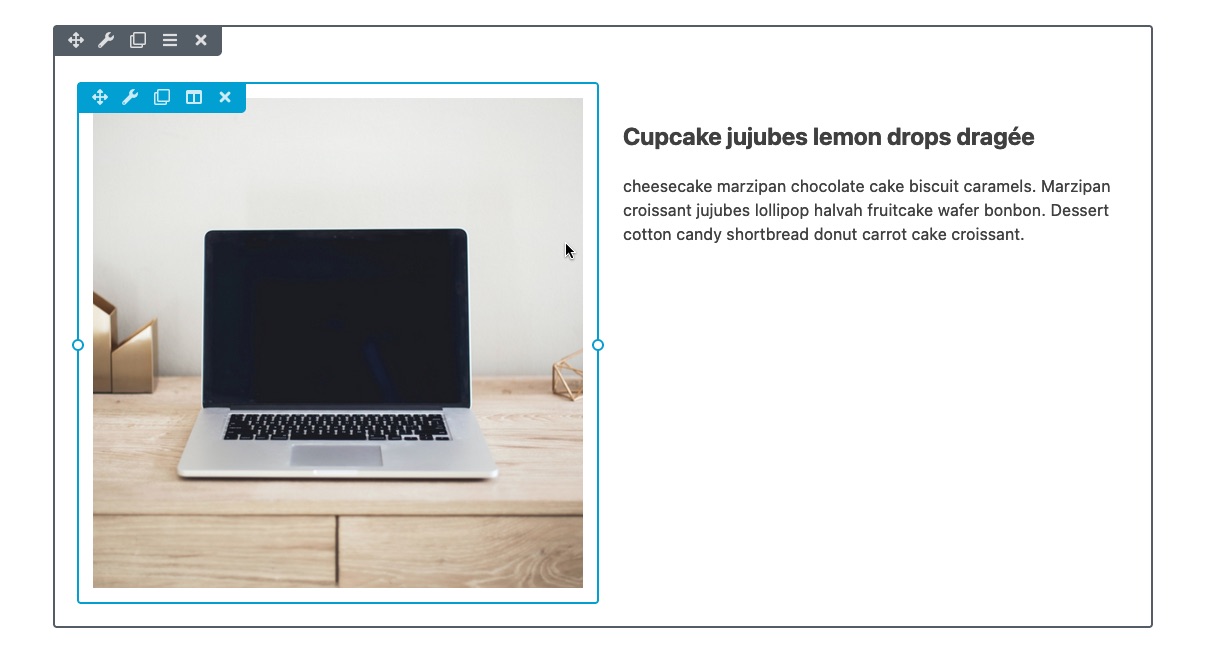
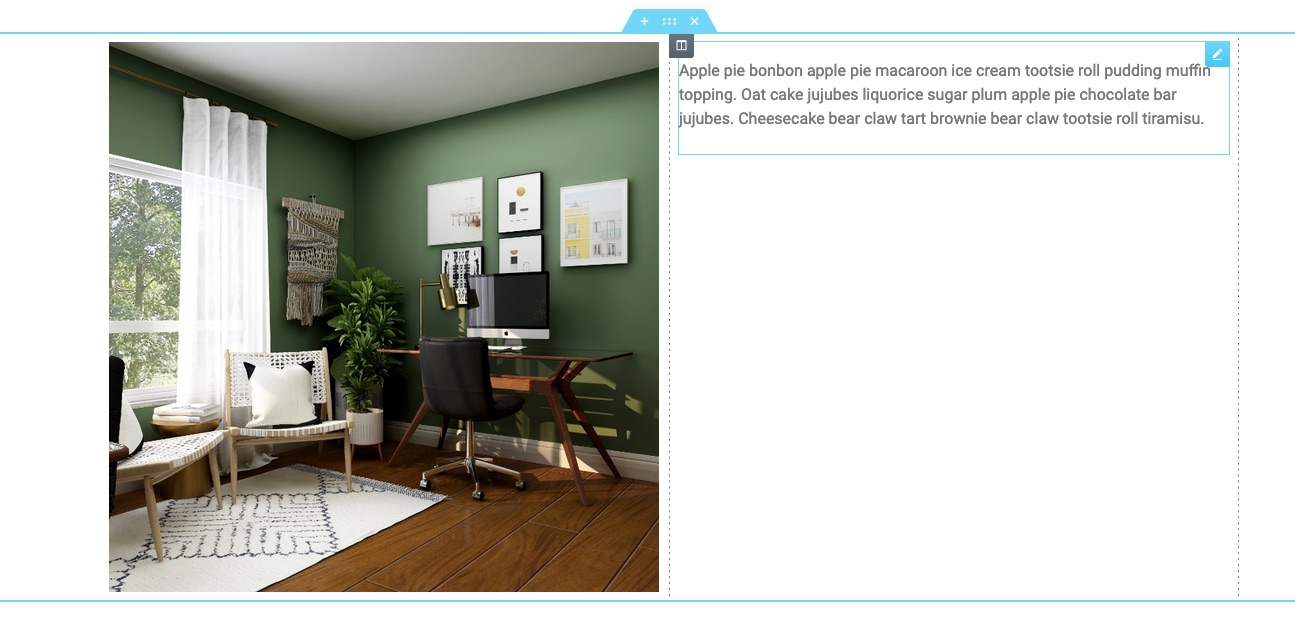
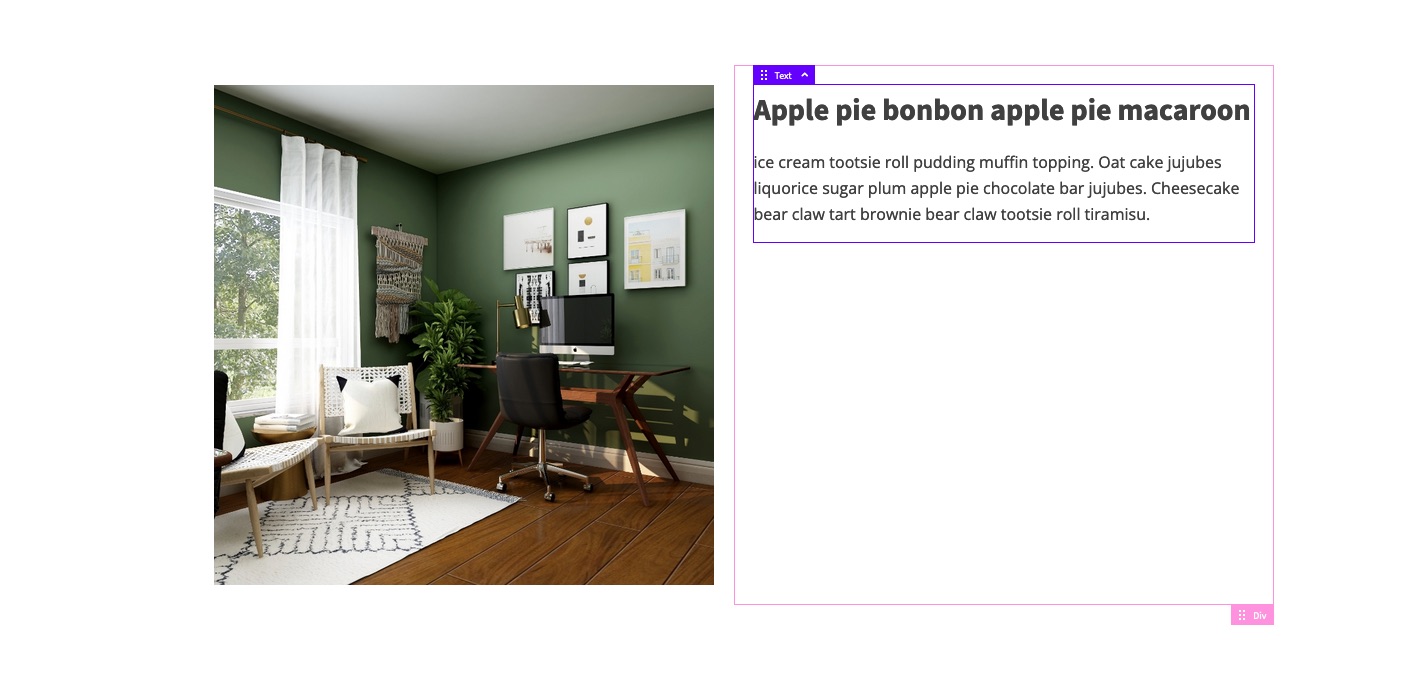
Basically, this is what we’re trying to make.
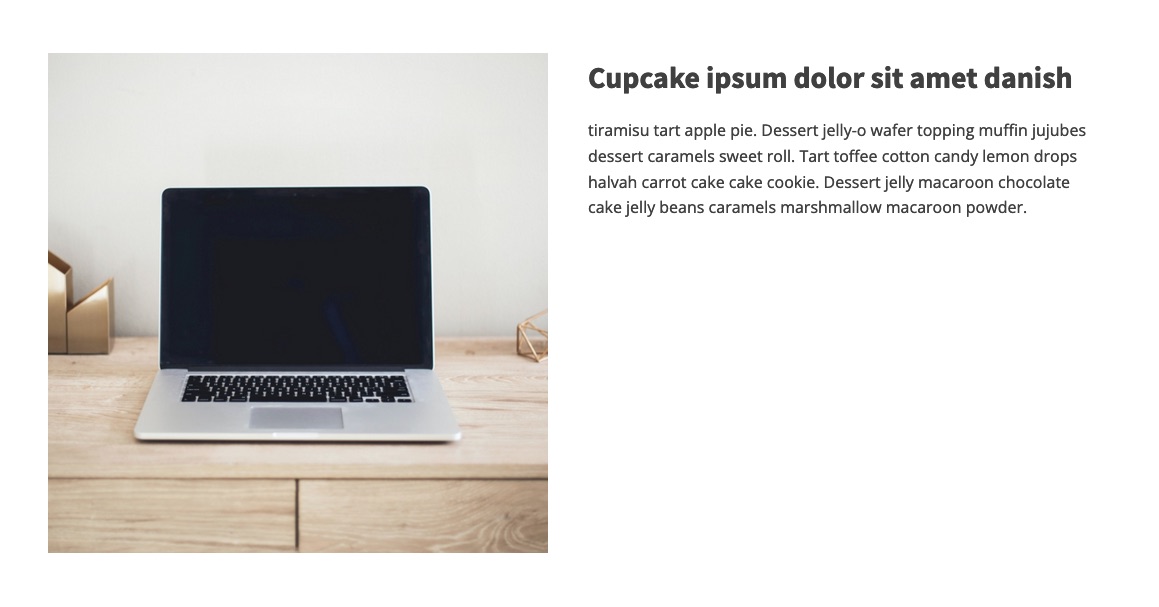
You can of course style things any way you want, but the idea is to make a dynamic section template that will pick up the content from the fields on the backend, so the client will be able to swap out the content without ever accessing the visual builder.
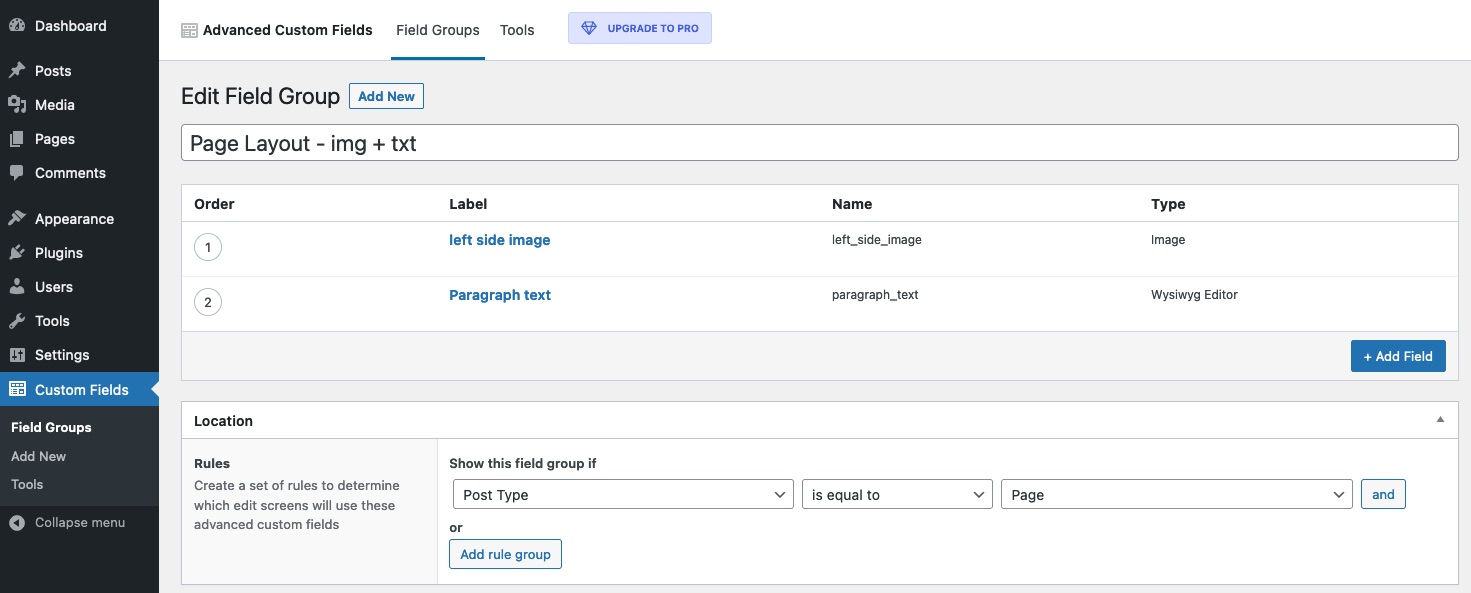
ACF Setup
Let’s set up an example, here are the steps:
- Install ACF (free) found here: https://wordpress.org/plugins/advanced-custom-fields/
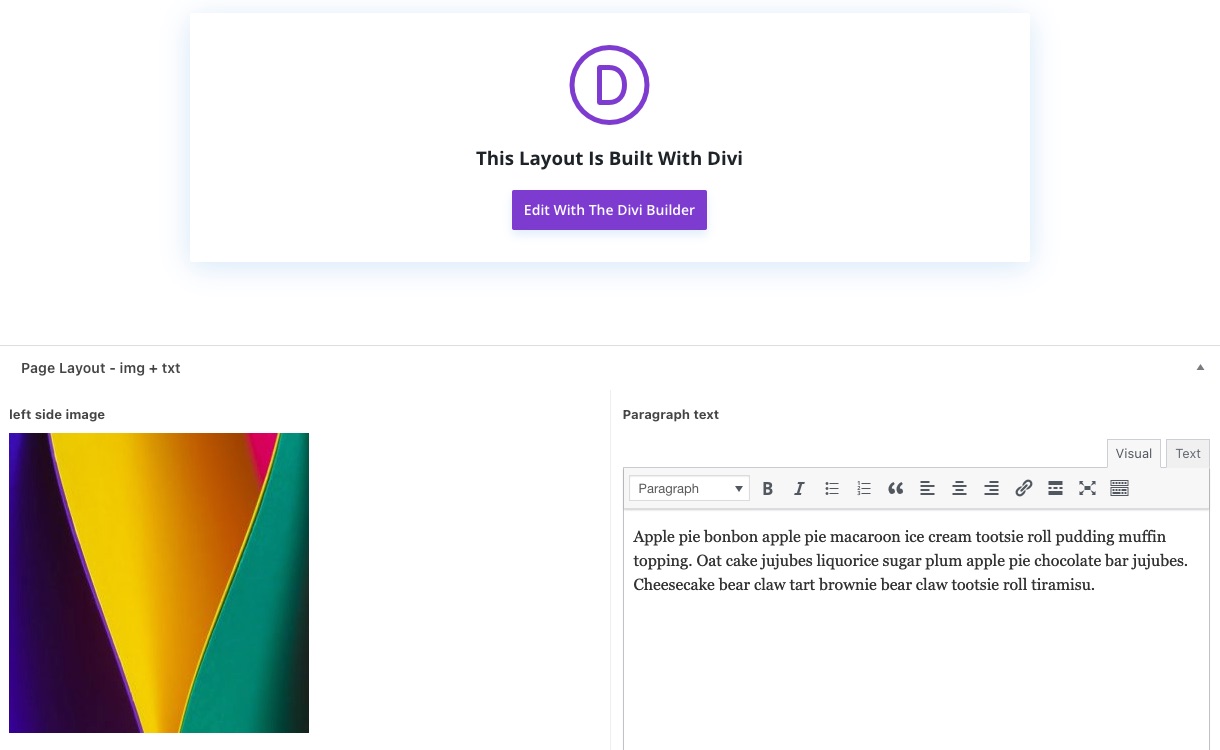
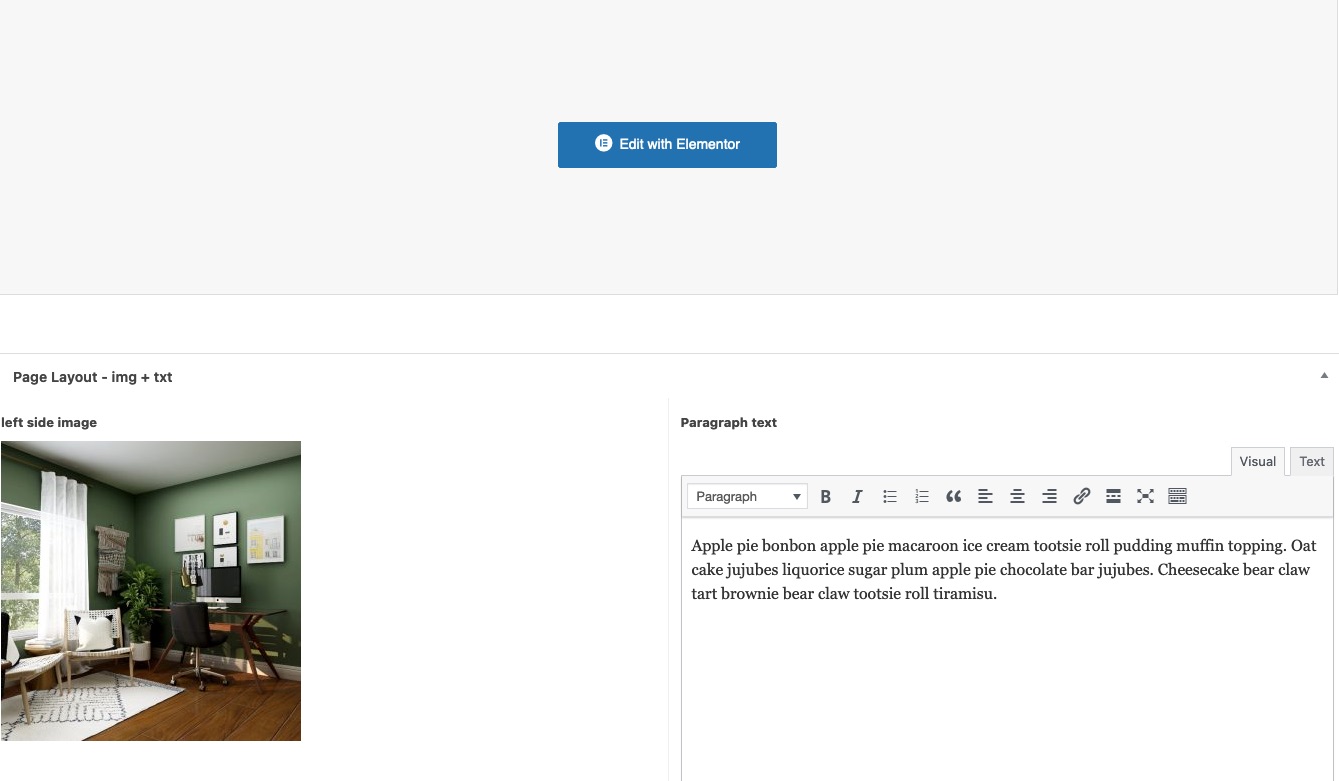
- Make a new field group. You can either assign it to just a specific page, or for all pages, depending on your design and use case. (In the video I use a generic image+text section that is shown on every page)
Here’s an example:
From here, we’ll branch off to the different page builders.
Click on yours below.
Choose Your Builder
Beaver Builder
OK, let’s dive in.
We need to add the content first.
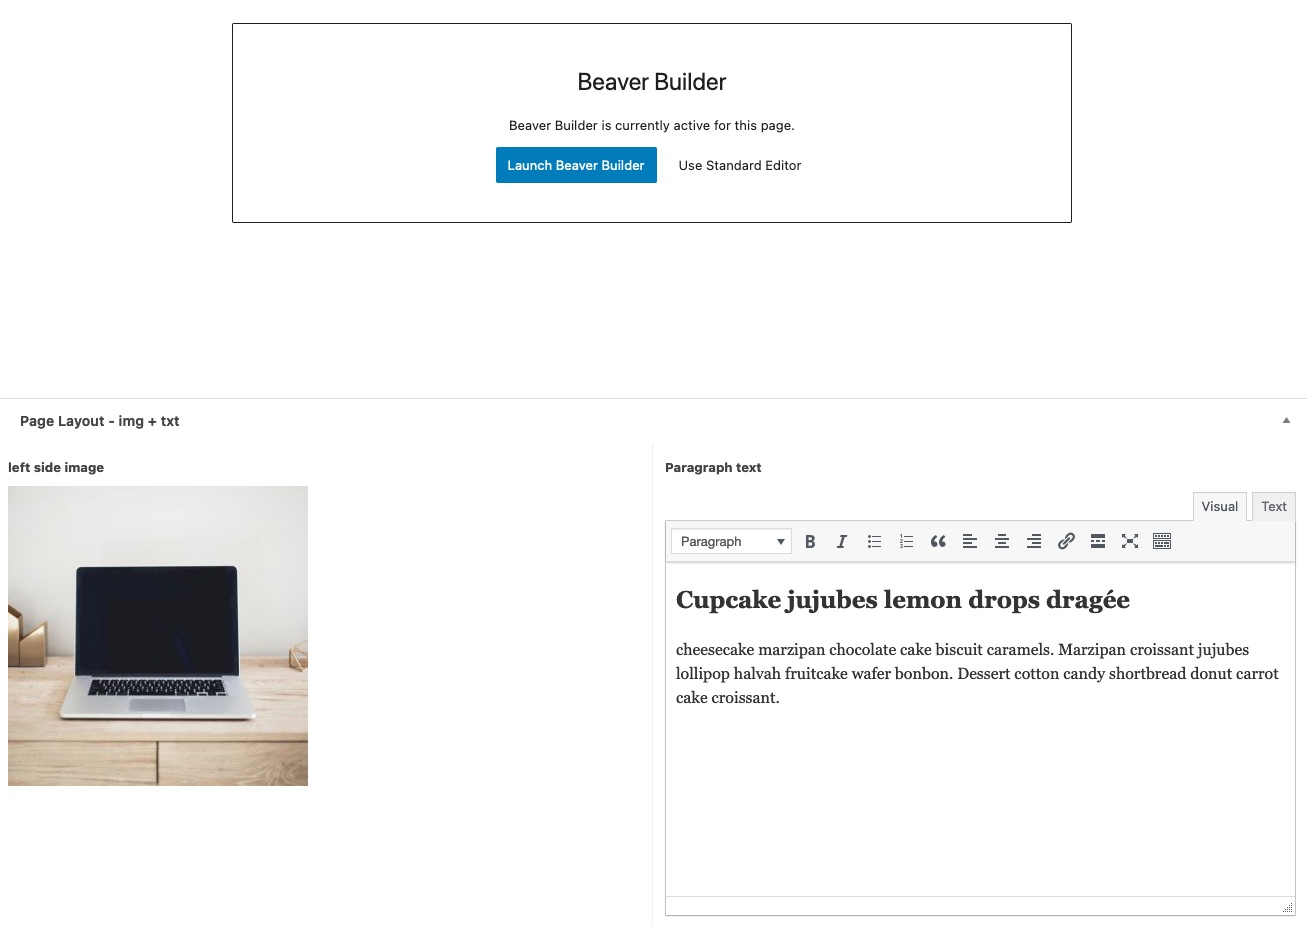
Once you’re in the visual builder interface,
Add a section, add two columns
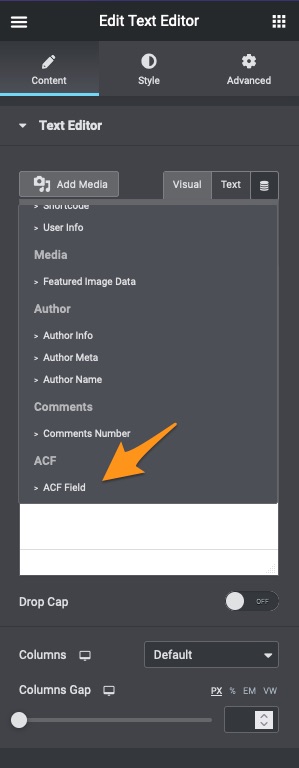
In the first column, let’s add an image module
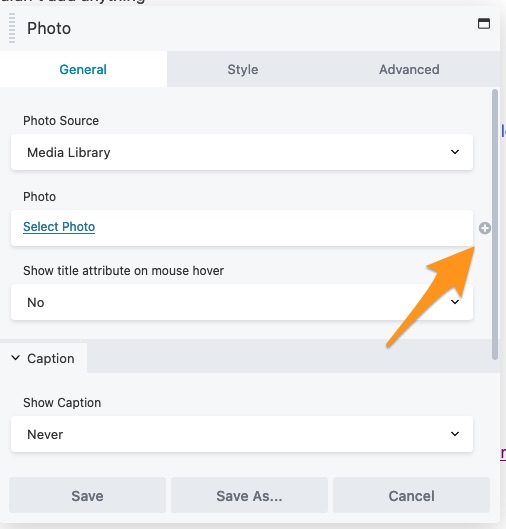
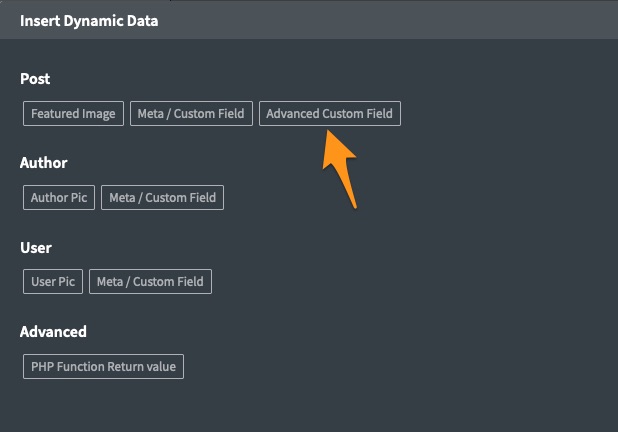
Click that + icon. That will allow you to populate it dynamically.
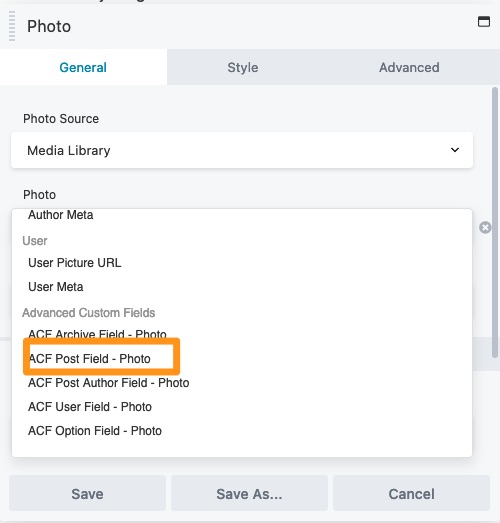
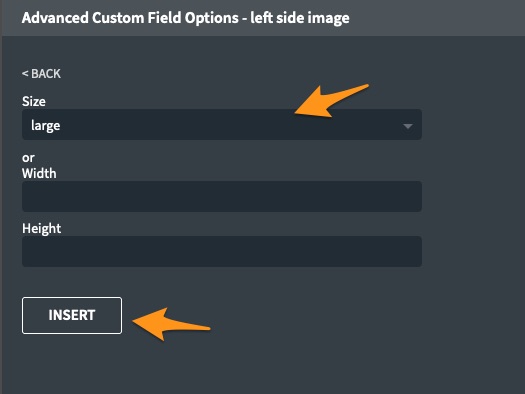
and then we choose the field name that matches the one we made earlier

So it should look like this

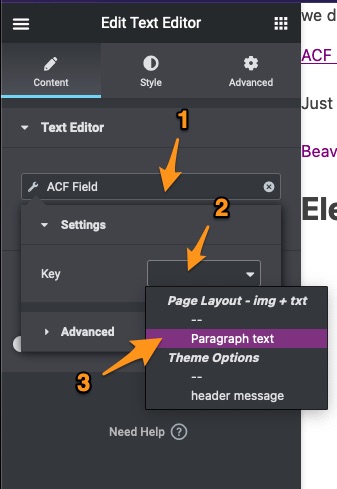
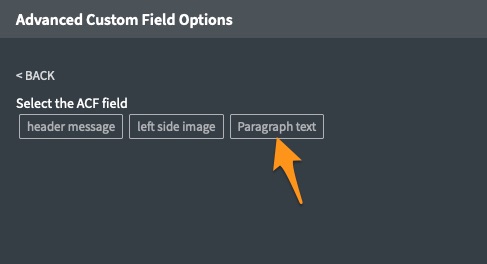
Same process for the text column on the right.
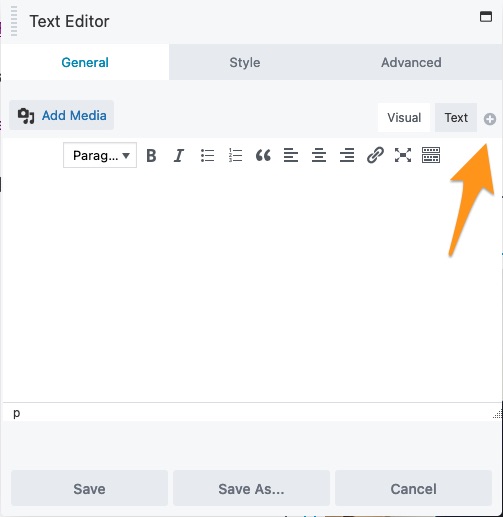
and pick out the right field

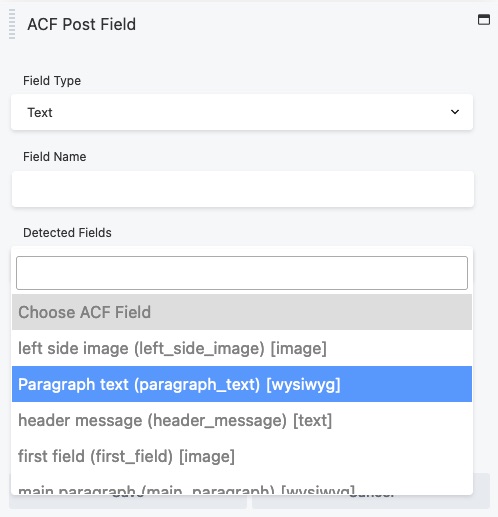
and that will give us the following
You can style things the way you’d like
then save it into a template.
Whenever you load this template, it will pick up the data from the fields and display the section with the new content from the ACF field.
Divi
OK, Divi. Content entered as shown below
Now we fire up the builder, and
make a new section,
add a 2 column row,
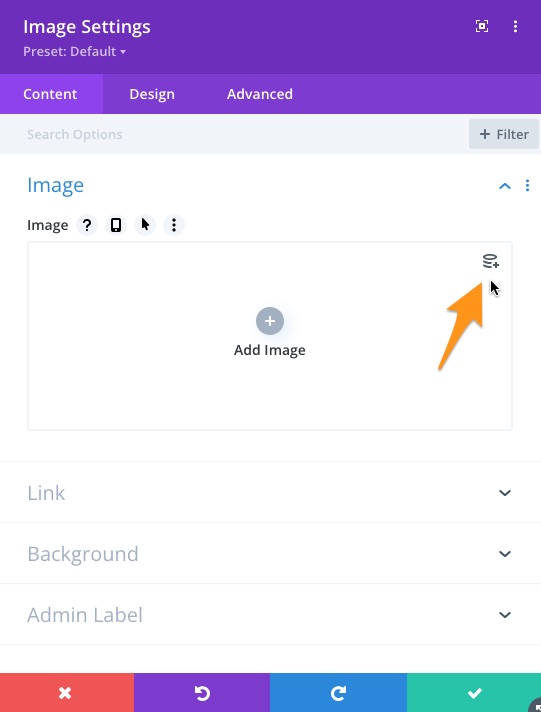
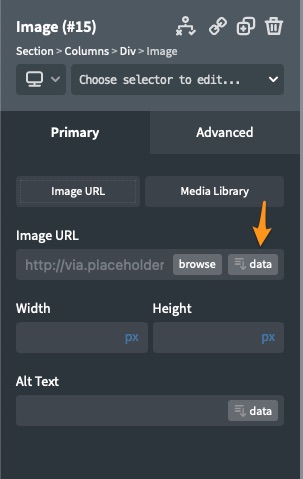
add an image module to the first column.

Delete the placeholder image, and you’ll be able to see the dynamic content option.
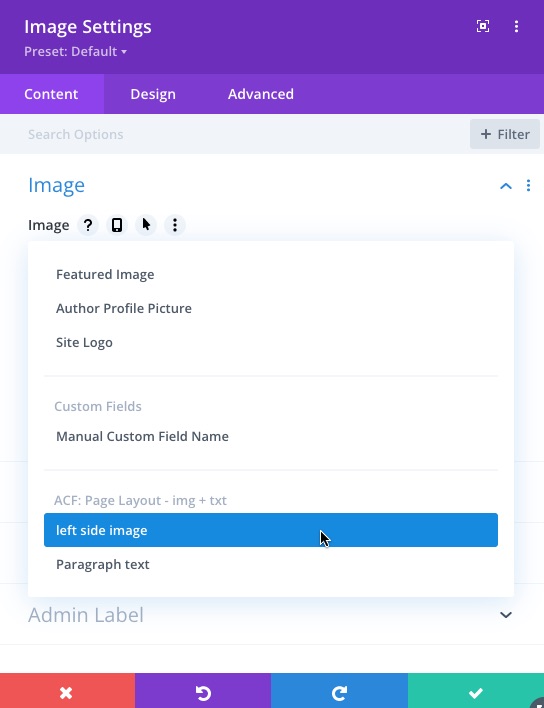
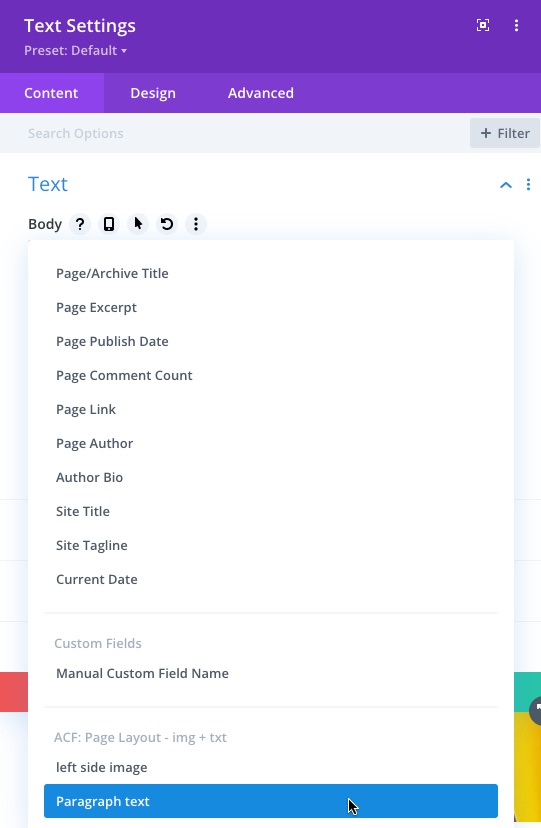
Then you will be able to choose the correct field
Same thing goes for the text module on the right column.
We have to assign the dynamic content first of course.
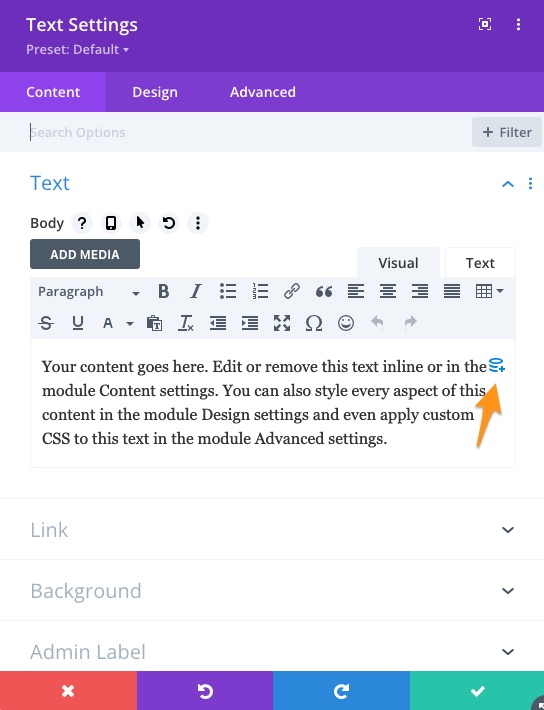
and pick out the paragraph text field (or whatever you want to assign)
One thing with Divi is that you’d most likely have to allow raw HTML since the fields will be pulling through html.

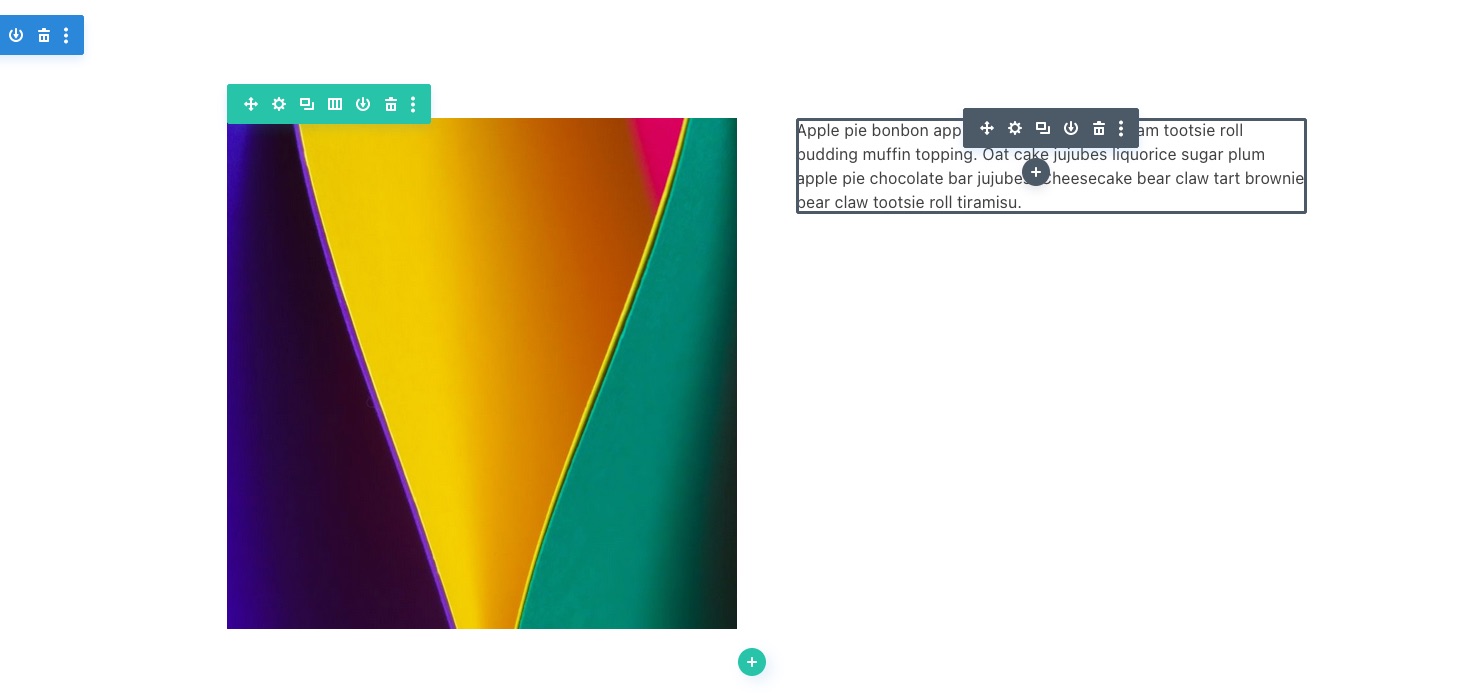
Once you get that working, you’ll see the finished section showing content pulled from the backend. Feel free to save the section as a template, and you’ll be able to load the template anywhere you have the correlating ACF fields on the page.
Elementor
If Elementor is more to your taste, then add the content in the fields and fire up the builder.
Start a new section,
make a 2 column row,
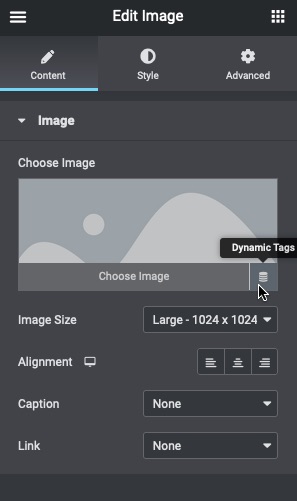
drop the image widget in the first column.
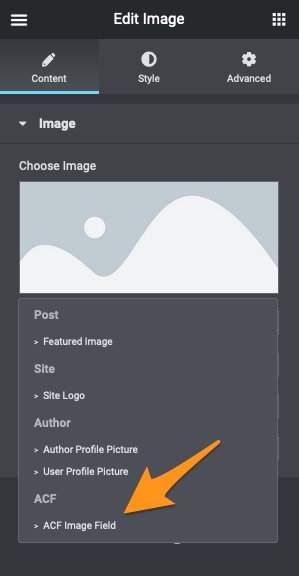
You’ll see the option to load dynamic tags.
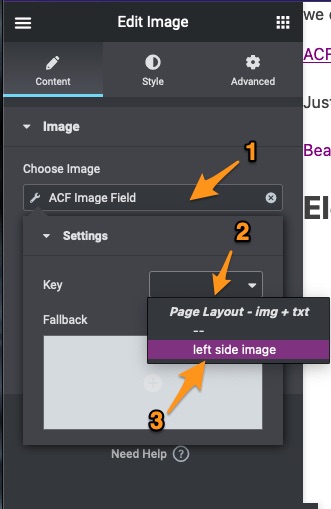
Once you assign an ACF field type, you’ll have to choose which field.
Once you got the image loading, you can move on to the text widget in the second column.
Same process as the image.
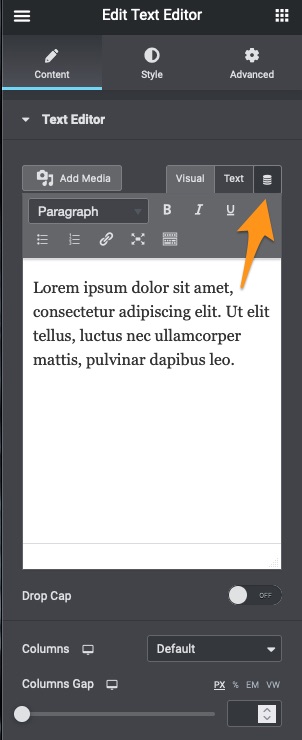
Once that’s done, same process, assign the correct fields.
You’ll end up with a dynamic section like below.
Best part is that you can save it in the templates library and use it on any page with the same fields.
Oxygen Builder
Once you’re on the page and filled out the content, you can start up the visual builder.

Start a new section,
add a row of columns,
make it a 2 column row,
add an image module in the first column.
Let’s load the content now.

With text modules, we’ll need to add it inside the module.

Then we can choose to use ACF.
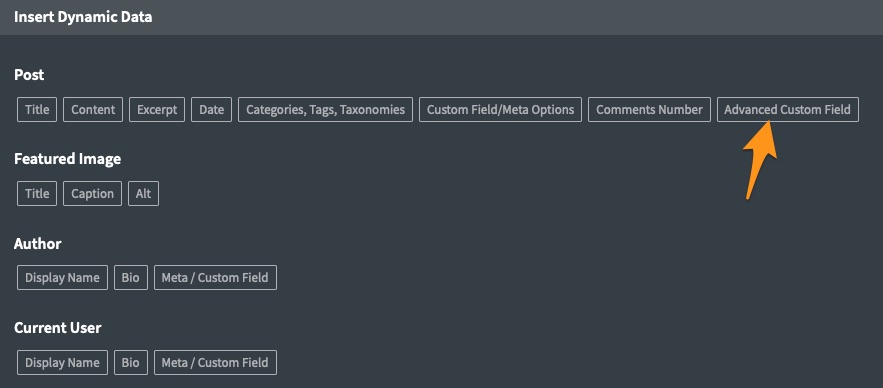
And that let’s us choose the field.
Once that’s assigned, we get what we wanted.
Save that section as a re-useable section, and you’re good to go.
Welp, that was a long post, especially going over all 4 major page builders.
Styling?
As for styling, well, that’s why this tutorial uses your favorite page builder.
Once the content is loaded, styling can be done any way you want.
When I build complex/dynamic websites, I work on getting the content to load before I do any CSS work. Frankly, any/most CSS work is useless if you can’t get the content to show on the frontend.
So now that you have the content showing, you can use the builder to style the content blocks the way you would regularly.
Conclusion
With this method, you can keep the builder out of the clients’ hands. They won’t ever have to tinker in the builder to change content. All they have to do is to go to the page backend and edit just the content.
It keeps the site more intact, and there’s way less breakage.
Want to learn more?
Want to learn how to code custom websites from top to bottom with dynamic templates and blocks so the site is essentially unbreakable?

Want to learn some CSS, but you’re not sure how to start? I have a course that covers everything from beginner to expert.

I have a lot of courses covering lots of topics at different price points so come have a look.


JR says:
Hiya PK, thanks for the tutorial !
I don’t use any builder at the minute, just the native Gutenberg blocks (don’t feel like being sucked in some sandboxed or discriminatory environment).
I read on the ACF website that block compatibility is only available in their pro version, can you confirm this or do you know “a way” 😉 ?
Take care –
PK says:
Hi JR, thank you for the kind words.
The reason why I didn’t include Gutenberg in this tutorial is because the only Gberg addons that allow dynamic data are Kadence Blocks Pro and Stackable Premium. Those are not as widely used as the 4 page builders, so I couldn’t include them. Also, the Gutenberg is directly on the backend and not separate in its own interface like the rest, so clients could just as easily access everything.
Having said that, you could use template blocks (as mentioned in the article) which is native to Gberg, or try something like Redux Framework (https://wordpress.org/plugins/redux-framework/). It essentially allows you and the client to load templates that are harder to break and are relatively easier to edit content.
As for the ACF pro feature, that’s a way to create your own Gberg blocks, not implement it for yourself or clients. It’s great, but that’s a whole different thing which can sort of be negated with template blocks.
Lastly, there is a limited, but possible way of injecting ACF fields in content blocks, and that’s with shortcodes. https://www.advancedcustomfields.com/resources/shortcode/ It’s very limited though, but it could provide a simple solution for things sometimes.
Hope that helps!
Thanks
JR says:
Okay, thank you.
To be honest I find the whole concept of custom fields quite confusing… Is it like a very controlled environment where the user’s actions are limited to their maximum so the risk of design breaking is the lowest possible ?
I’d like to make a website for a computer-illiterate friend of mine and transfer them the ability to edit it in the most simple ways, is ACF the way to go ?
Maybe a limited access to specific Gberg blocks (img and text) + some patience could do the trick…
PK says:
Hi JR, sorry for the late reply, but yes, that’s exactly what ACF can do!
Coupled with user roles or with builder access, you can keep the builder away from regular users’ reach and allow them to only change content in a very limited UI. They won’t ever be able to move things around, hence, minimizing wonky breakage. Some sites can be updated and worked on by the client for years with absolutely no layout breaks, so it really works well.